Follow these steps to emulate your MAF application build in JDeveloper on an Android device ..
1. Make sure MAF Extension is installed in JDeveloper.
Choose Help, Check for Updates and check the MAF Extension to install it.
2. Install JDK 8, which MAF needs
http://www.oracle.com/technetwork/java/javase/downloads/jdk8-downloads-2133151.html
3. Download the Android SDK
http://developer.android.com/sdk/installing/index.html?pkg=tools
4. Generate a key store for your Android keys.
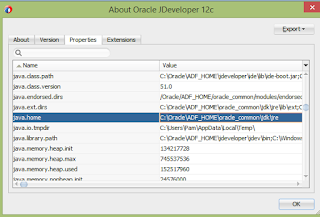
First make sure you know the java home on your machine.
keytool -genkey -v -keystore mykey.keystore -alias mykey -keyalg RSA -keysize 2048 -validity 10000
I had some issues with the - when I copied it from Step 6 Deploy and Test the application
http://docs.oracle.com/cd/E53569_01/tutorials/tut_jdev_maf_app/tut_jdev_maf_app.html
Make sure you remember the password :-).
5. Make sure you install the packages as described in the Android SDK
http://docs.oracle.com/cd/E53569_01/tutorials/tut_jdev_maf_setup/tut_jdev_maf_setup_2.html
Don't forget this step
To use the Intel x86 Emulator Accelerator, once downloaded, you then must then install the drivers.
To install the Intel HAXM executable, search your hard drive for IntelHaxm.exe.
Navigate to Windows Explorer and locate the <android_home>\android-sdk\extras\intel\Hardware_Accelerated_Execution_Manager\intelhaxm-android.exe file. Double click it and you can use the defaults while it installs.
6. In JDeveloper make sure you set the MAF Android settings as described in Step 6
http://docs.oracle.com/cd/E53569_01/tutorials/tut_jdev_maf_app/tut_jdev_maf_app.html
If you would deploy now you would get
Failed to detect a connected Android emulator. Make sure the emulator is running. Otherwise, manually restart the ADB server. The following results were provided by ADB:
List of devices attached
Because you have to do step 7 first, start the emulator.
7. Start the Emulator using the SDK Manager at the location where you installed the Android SDK.
See step 22 at
http://docs.oracle.com/cd/E53569_01/tutorials/tut_jdev_maf_setup/tut_jdev_maf_setup_2.html
AVD Name = MAF
Device = Nexus 7
Target = Android 5.0.1 - API Level 21
CPU/ABI = Intel Atom (x86_64)
Internal Storage = 200 MiB
Skin = No Skin
Front Camera = Emulated
Back Camera = None
Memory Options Ram = 1024
SD Card = 640 MiB
Use Host GPU = Selected
If you get
Starting emulator for AVD 'MAF'
emulator: ERROR: x86 emulation currently requires hardware acceleration!
Please ensure Intel HAXM is properly installed and usable.
CPU acceleration status: HAX kernel module is not installed!
You forgot step 5 :-).

Geen opmerkingen:
Een reactie posten
Opmerking: Alleen leden van deze blog kunnen een reactie posten.